
WordPress の投稿を自動でTwitter にツイートしてくれる連携プラグインWP to Twitter。
IFTTTのようにツイートする際のテンプレートを自由にカスタマイズできるだけでなく、カスタムツイート機能を使って記事別にツイート内容を変更できたり、記事により連携するしないを選択できたり、さらにはハッシュタグに関する詳細設定までできるという、非常に高機能な連携プラグインです。
設定がかなり細かいWP to Twitterすが、Twitterとの認証を済ませれば基本的な連携は完了しますので、今回はそのTwitter 認証の部分から紹介させていただきます。
WP to Twitter のインストール
管理画面のプラグイン新規追加よりWP to Twitterを検索するか、以下のページからプラグインファイルをダウンロードします。WP to Twitter

WP to Twitterを使うまでの大きな流れとしては、Twitter でアプリケーションを作成してWordPress の管理画面から連携設定を行った上で、ツイートのテンプレートの設定及び細かいオプションを指定します。
※テンプレートの設定などについては、次回の記事にて紹介させていただきます。
Twitter でアプリケーションの作成
ますはTwitter アプリケーションの作成からですが、管理画面左メニューの「設定」から「WP to Twitter」ページへ行き、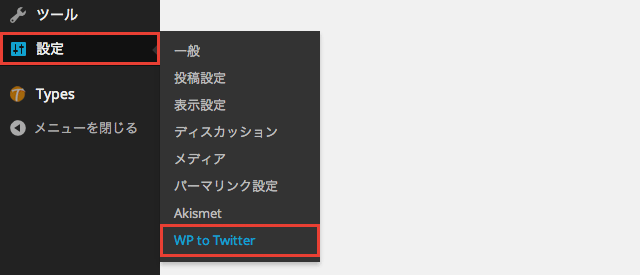
「1. このサイトをアプリケーションとして登録する」より「Twitter アプリケーション登録ページ」リンクをクリックします。
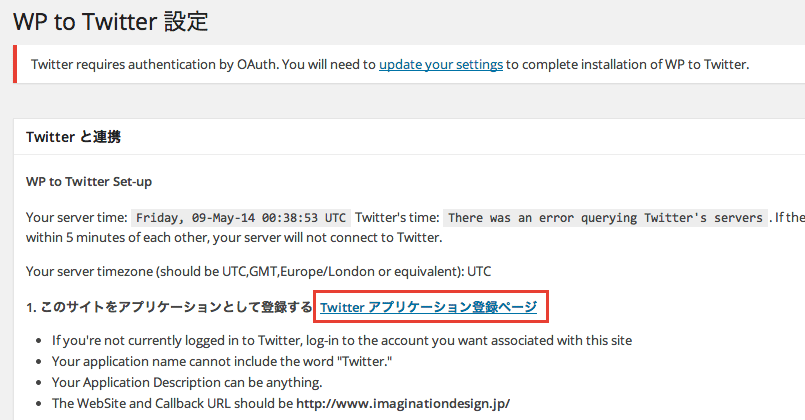
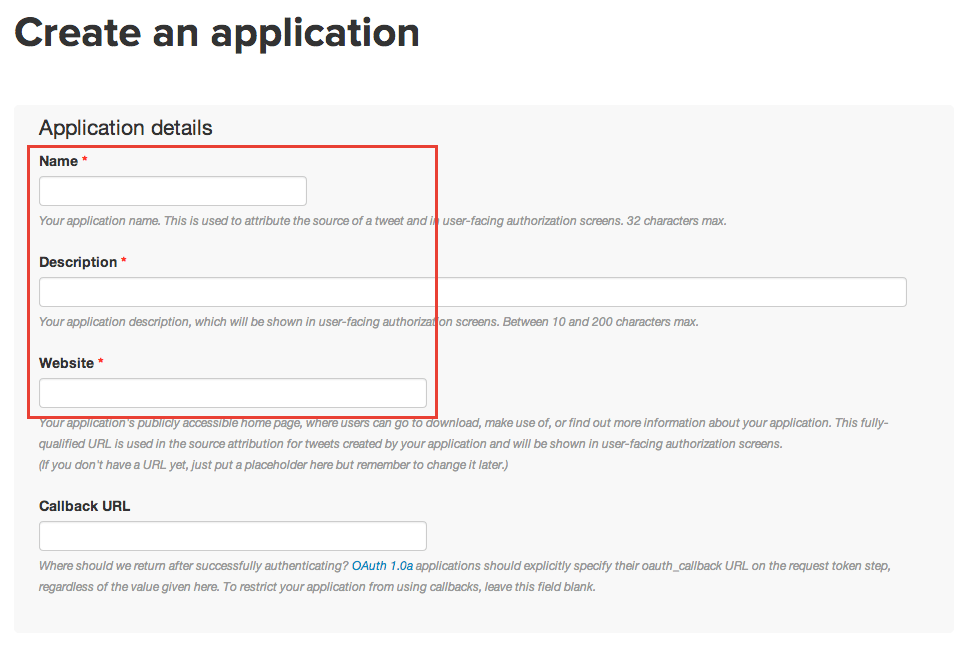
Twitter のCreate an application ページへ遷移しますので、以下の必須3項目
Name(アプリケーション名)
Description(アプリケーションの説明文)
Website(アプリケーションを利用するブログURL)
を入力して、アプリケーションを作成します。Description(アプリケーションの説明文)
Website(アプリケーションを利用するブログURL)
Twitter アプリケーションの設定
アプリケーションの作成に成功すれば、そのまま以下の3点の作業と確認を行っておきます。①Access level
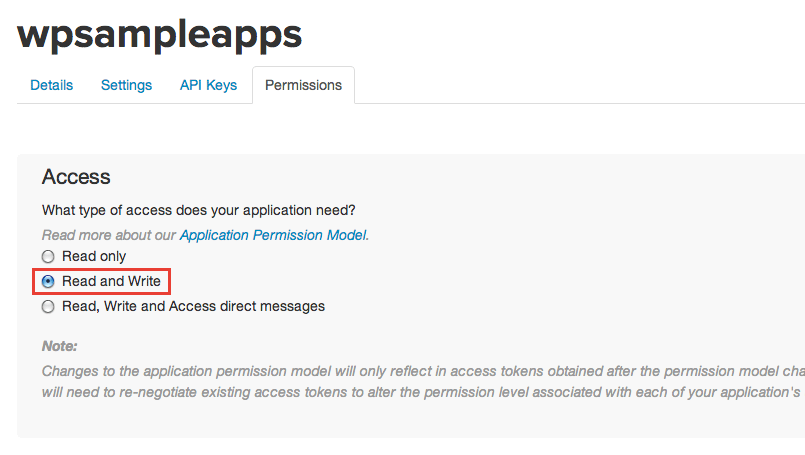
まずはApplication settings のAccess level 欄より「modify app permissions」リンクをクリックし、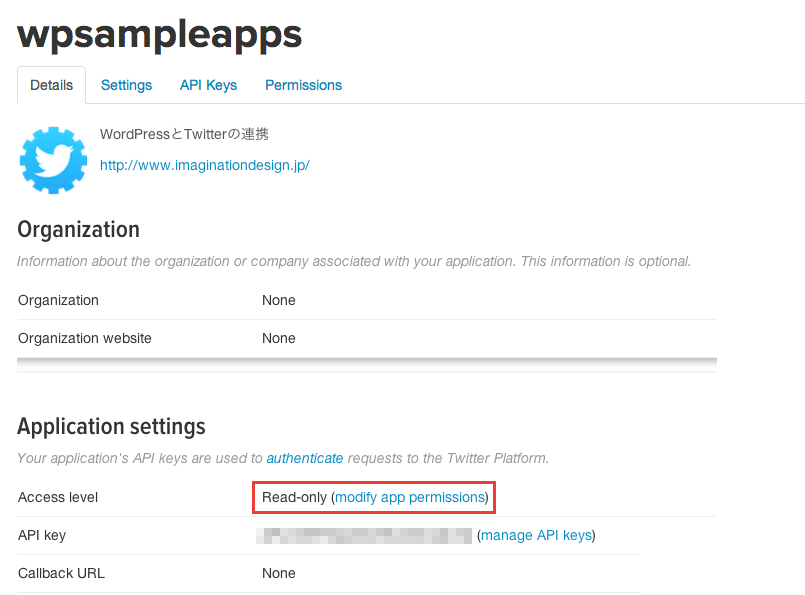
Permissions のページへ移動してから、Access のラジオボタンから「Read and Write」を選択します。
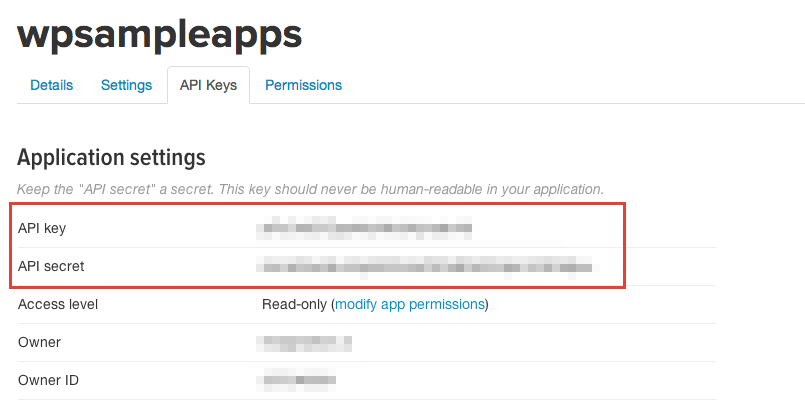
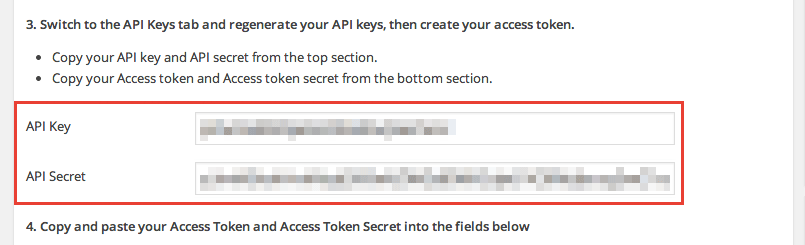
②API key、API secret
続いて、API keys タブをクリックして表示されるAPI Key
API Secret
をコピーしておきます。API Secret
③Access token
同じくAPI keys タブ内のYour access token で「Create my access token」ボタンをクリックします。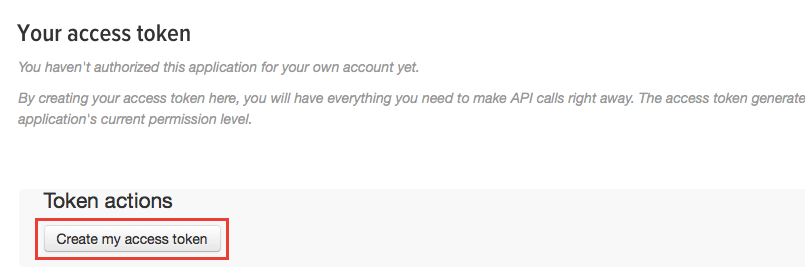
Your application access token has been successfully generated. It may take a moment for changes you’ve made to reflect.
Refresh if your changes are not yet indicated.
と表示されるかと思いますので「Refresh」をクリックすると、
Access token
Access token secret
が発行されます。Access token secret
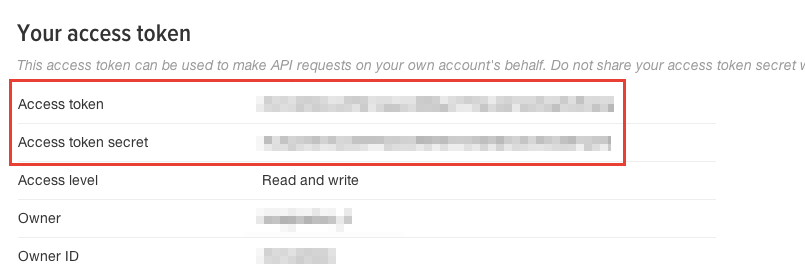
これも後で使うのでコピーしておきます。
WP to Twitter の連携設定
WordPress の管理画面に戻り、WP to Twitter設定ページ内の「3. Switch to the API Keys tab and regenerate your API keys, then create your access token.」にて、上記②の
API Key
API Secret
を入力(ペースト)し、API Secret
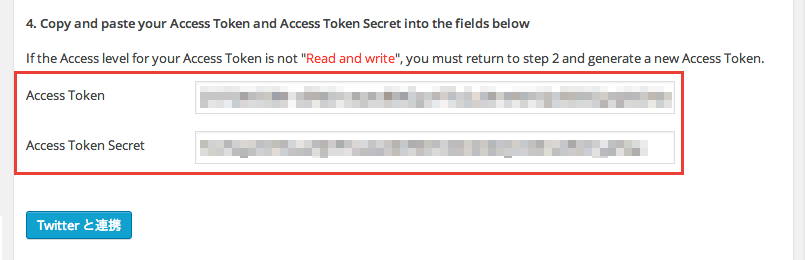
同じく「4. Copy and paste your Access Token and Access Token Secret into the fields below」にて上記③の
Access Token
Access Token Secret
も入力(ペースト)して、「Twitter と連携」ボタンをクリックします。Access Token Secret
「WP to Twitter は Twitter と連携しました。」と表示されればOK です。
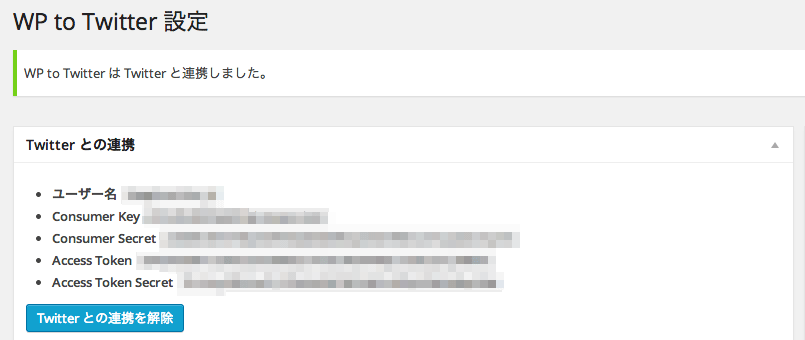
ここまでの連携設定で、投稿記事については自動連携が完了していますので、いつも通り記事を投稿すればTwitterへも自動投稿(ツイート)されるようになります。
次回はツイートする時のテンプレートの設定やハッシュタグの設定の他、「カスタム投稿タイプ」の投稿記事を連携する方法、WP to Twitterの細かいオプション設定についても紹介させていただきます。


コメント